Z-Clip Mount and Impaling Clip Mounting
Recommended Installation Instructions for Z-Clip Mount
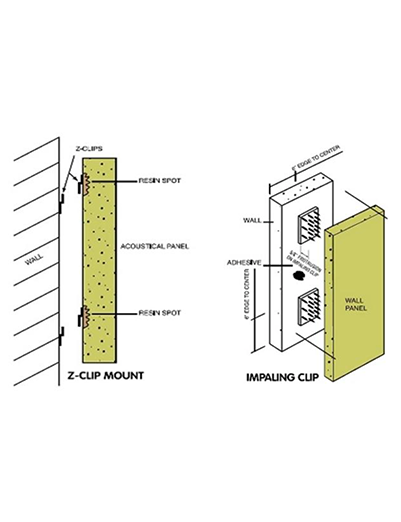
Z-clips are factory mounted to the wall panels. A resin spot is required on the back of the panel where z-clip is factory mounted. Z-clips are available with 3/8″ or 5/8″ lift off and are approximately 2″ wide.
- Determine location of wall z-clips by measuring location of panel mounted z-clips. Mark a level line on the wall for the elevation of z-clips.
- Attach wall z-clips with appropriate drywall anchor or masonry anchor.
- Slide panel over wall mounted z-clips until panel clips interlock and wedge together.
- A lock off clip may be installed at the top of the panels at the contractors option.
- Finally, brush the panel with a soft bristle brush to clean panel.
Recommended Installation Instructions for Impaling Clip Mounting
- Mark a level line where the bottom of the panels will be located.
- Use supplied barbed clips attached to the wall with a 1 5/8″ drywall screw. Typical panels require 4-6 barbed clips per panel. No in-wall blocking is required for impaling clips.
- Apply construction adhesive to the perimeter of the back and center of the panel as needed.
- Press the panel onto the impaling clip so the bottom of the panel aligns with the level line. A woodblock may be used to press panel onto clips to prevent indentations in panel face.
- Finally, brush the panel with a soft bristle brush to clean panel.
Hands must be clean at all times when handling panels.